| Click on the Thumbnail for a full-size photo |
Description |
|---|

alan01
|
1. As the heavy and medium artillery of 3 AGRA pounds Nuland and the factory, 4 Welch Group breach the antitank ditch with the aid of AVREs, fascines, SBG bridges, bulldozers and a Churchill ARK. The Cromwells of 5 RIDG are soon across and providing close support to the infantry. Beyond the railway, 2 Monmouths Group advance along a very narrow corridor toward Kruisstraat. |

alan02
|
2. On the left, 1 Highland Light Infantry (HLI) Group, supported by a squadron of 5 RTR, cross the antitank ditch and bypass Nuland; heading for Maleskamp and Coudewater. |

alan03
|
3. Despite massive artillery preparation and smokescreens, the sappers supporting 4 Welch get heavily 'stonked' as they attempt to breach the minefields in front of Nuland. |

alan04
|
4. Hemmed in between the railway and the soggy polder land of the Maas valley, 2 Monmouths Group attempt to make headway along the Dyke Road to Kruisstraat, but are delayed by their own artillery barrage. |

alan05
|
5. Artillery preparation on Kruisstraat causes some disruption, but the German defenders remain largely intact and wait for the British to follow up their barrage. |

alan06
|
6. Grenadier-Regiment 745 is deployed in considerable depth, with a lot of heavy weaponry held in reserve - here we see the position at the Bruggen road junction. |

alan07
|
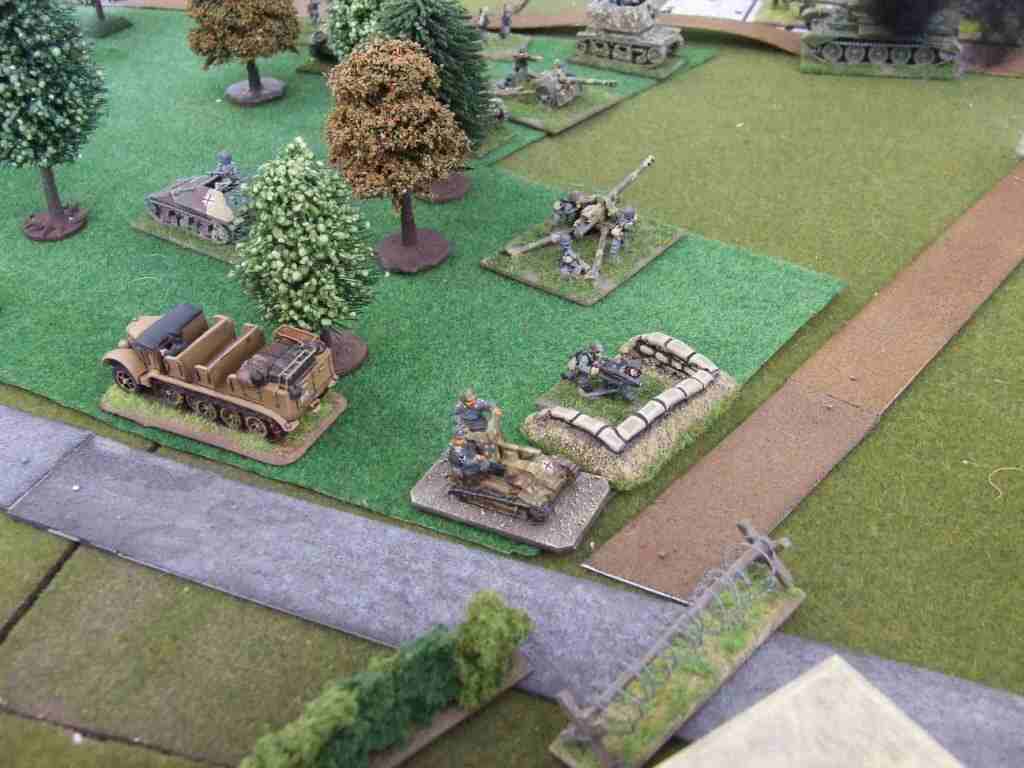
7. Jagdpanthers and StuGs mass behind the ramparts of Fort Alexander, ready to mount a counter-attack. The guns of Artillerie-Regiment 1716 are deployed in the fields around Hintham and the fort. |

alan08
|
8. Fort Alexander is a remnant of the outermost 18th & 19th Century defences of 's-Hertogenbosch, but still provides a good defensive position for the waiting Fallschirmjäger. |

alan09
|
9. A pre-planned strike by a squadron of Typhoons hits the Bruggen road junction. However, by sheer luck, the German commander has massed two entire flak companies in the immediate vicinity and the RAF suffers heavy losses for little gain. |

alan10
|
10. The lead Typhoon pilot pulls up after delivering his bombload. His squadron-mates are not so lucky. |

alan11
|
11. The Luftwaffe puts in an appearance over the battlefield. |

alan12
|
12. 1 HLI moves up through the woods and hedgerows towards Maleskamp. Suddenly there is contact with the enemy, as the lead Cromwell is destroyed by a waiting 88 (just off picture). |

alan13
|
13. With the fighting still going on in Nuland and the factory, elements of 4 Welch and 5 RIDG bypass the defenders and push on toward 's-Hertogenbosch. 13a is the same scene in closeup. |

alan13a
|
13a. |

alan14
|
14. Füsilier-Bataillon 712 defending Nuland suffers terrible losses to artillery during the initial assault. 4 Welch and the 'Funnies' make short work of the village itself and swing around to assault the southern trench-lines simultaneously from front and rear. However, the defenders of the factory are determined to go down fighting. |

alan15
|
15. The first Cromwell to reach Kruisstraat falls victim to a German antitank gun. As the traffic jam continues to build up behind them, the British armour attempts to deploy off the Dyke Road, as infantry move up on the left. British Forward Observers and Forward Air Controllers meanwhile, attempt to find advantageous elevated positions atop the railway embankment and on industrial spoil heaps. |

alan16
|
16. Now beset from all four sides, the defenders of the factory continue to hold their ground. |

alan17
|
17. As the rearmost mortar positions of Füsilier-Bataillon 712 are engaged by infantry, the Cromwells push on towards the city. However, they soon run into the next German position - a strong 'Pakfront' of 88s, PaK 40s, self-propelled guns, Panzerschrecks and the German 'secret weapon'… The division's 4.2-inch mortars lay a smoke screen in front of the tanks as they attempt to deploy off the road. |

alan18
|
18. The second pre-programmed British air-strike arrives, hitting the vicinity of Fort Alexander. The German heavy armour is caught in the open as it moves forward. However, thick flak from quadruple 20mm guns puts the RAF off their aim and they cause little damage. |

alan19
|
19. As 18. |

alan20
|
20. A Typhoon streaks low across the German armoured column. |

alan21
|
21. As a Typhoon climbs out over Rosmalen, we get a good view down the long axis of the battlefield. The British are advancing from the far table edge, toward the camera. 21a is the same scene in closeup. |

alan21a
|
21a. |

alan22
|
22. The Luftwaffe chases the Typhoons. 22a is the same scene in closeup. |

alan22a
|
22a. |

alan23
|
23. I. Battalion, Grenadier-Regiment 732, waits in Maleskamp for the British assault to reach them. |

alan24
|
24. With close assistance from some AVREs, 4 Welch finally clears the factory complex and Füsilier-Bataillon 712 is annihilated. |

alan25
|
25. With the factory finally cleared, the traffic jam behind 4 Welch finally begins to move. |

alan26
|
26. At the spear-point of 4 Welch Group's advance, the destruction of an 88 by accurate fire from the Royal Artillery encourages the British cavalrymen to do something rather rash… One Cromwell soon goes down to a 75mm PaK 40, while another two (including the British squadron commander) go down to the puny 47mm gun of a Panzerjäger 35R(f). |

alan27
|
27. With the leading tanks burning and their comrades under steady antitank fire, the British commander pushes up infantry and Crocodiles to take on the PaKfront. British artillery meanwhile, pounds the German positions, but to little effect. 27a is a close-up of the same scene. |

alan28
|
28. With Nuland cleared, General Ross decides to launch Operation 'Saucepan'! 53 Recce Regiment is soon motoring up the southern route, with 1 East Lancs follows close behind, safe in their new Kangaroos. |

alan29
|
29. Part of the PaKfront in close-up - a PaK 40 is flanked by two Panzerjäger 35R(f)s, while a StuG III B covers the flank. |

alan30
|
30. The 'secret weapon' (37mm PaK 36 on a UE 430(f)) opens up at the flank of a 5 RTR Cromwell! The Cromwell is disordered by the 37 and is then finished off by a Panzerschreck. |

alan31
|
31. As Operation 'Saucepan' drives forward past Nuland, the PaKfront, having held on for as long as possible is assaulted from all sides and is annihilated. |

alan32
|
32. Despite traffic jams caused by burning AFVs at the head of the column, Operation 'Saucepan' drives on through Maleskamp as the position is finally overrun by 1 HLI and 4 Welch. |

alan33
|
33. Some of the team (from left to right): Richard de Ferrars, Martin Small, Paul Davison, Steve Uden, Ken Natt and Mark Davies. Missing In Action are Paddy Green and Gary Loosen.FAPA-DAA MiG-23 |