Karpilovka Photo 1
Karpilovka Photo 2
Karpilovka Photo 3

Karpilovka Photo 4
| Click on the Thumbnail for a full-size photo | Description |
|---|---|
Karpilovka Photo 1 |
Rather than attacking along the two axes dictated by the game setup, the Germans decided to maneuver their left-flank forces so that they hit more toward the center, thus concentrating their forces. Here the inital right-flank forces emerge from the woods and contact the Russian front-line. |
Karpilovka Photo 2 |
Another view of the Germans emerging from the woods. |
Karpilovka Photo 3 |
Having maneuvered to their right, the Germans send their forces against the Russian center. |
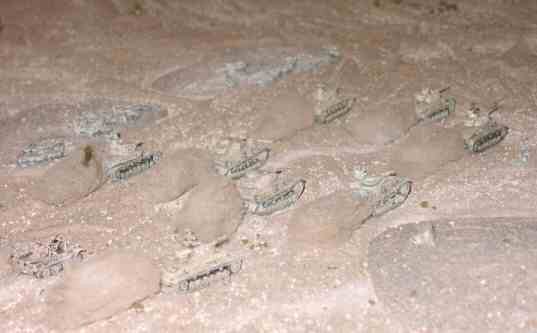
Karpilovka Photo 4 |
The battle climaxes as the Germans fight for the town. Note the destroyed vehicles. In this scenario, the Russians receive lots of victory points for destroying German AFVs. Despite being near their objectives, the Germans are fighting for a draw. |
| Click on the Thumbnail for a full-size photo | Description |
|---|---|
 Desert Photo 1 |
The Germans advance toward the center, leaving trails of dust behind them. |
 Desert Photo 2 |
British tanks move up to greet them. |
Desert Photo 3 |
The Germans assault the British left flank forces. |
 Desert Photo 4 |
The survivors of the British left head toward the German rear. |
| Click on the Thumbnail for a full-size photo | Description |
|---|---|
 The Battlefield from the West |
The Japanese forces ready themselves for a rush on the Western edge of the Australian positions. |
The Battlefield from the East |
The Japanese move through the overgrown garden and contact the front line Australian entrenchments. |
Preparing for the charge |
The Western Japanese reach the edge of the clearing and prepare to move up. |
 Scouts |
Private!-Go out there and look in the trees./Yes Sir, Right Away Sir. |
Fight in the North |
The battle rages for the Northern line of entrenchments. Other Japanese forces move up through the Jungle |
Scouts 2 |
We found them sir! The brave scouts encounter the Australian Western line of trenches. |
Move out! |
The Japanese Western force moves to attack. The Australians lay MG grazing fire. |
Engaged |
The Japanese Western force hits the front line. |
Into the Jungle |
Having broken into the Australian position, the Japanese encounter the second line of trenches, and Australian reinforcements move up. |
 Close Combat |
Fighting Rages in the Jungle. |
| Click on the Thumbnail for a full-size photo | Description |
|---|---|
The battle begins |
At the start, the Union Forces have moved into an exposed position. Historically, Meade ordered Sickles to pull back, but Sickles ignored him, inviting disaster. In the game, the Union did pull back. |
From Behind the Union Lines |
A view of the start of the battle from behind the Union Lines. |
 Another Angle |
Another view of the start of the battle. |
 From the Confederate side |
Confederate Forces prepare their assault. |
 Immediate attack on Devil's Den |
Confederate Forces launch an attack on the Devil's Den before the rest of the forces were ready. |
 20th Maine Awaits the Attack |
Union Forces on Little Round Top watch as Confederates move over Big Round Top. Devil's Den is in the background. |
 Devil's Den Falls |
The Confederates take Devil's Den. |
 A view from the Union Right Flank |
Union Forces prepare to meet the assault on the other flank. |
 Confederates move out |
The Confederates start moving out from Devil's Den. The head of a Union reserve force can be seen on the left. |
 The Defense coalesces |
Union forces on Little Round Top and opposing the Devil's Den thrust start to form a solid line. |
Chamberlain fights for the Hill |
The 20th Maine receives an attack on the Left Flank at Little Round Top |
The Union Line Forms |
As the Confederates push up the valley between Devil's Den and the Round Tops, Union forces prepare to meet them. |
Another View |
A view from the defenders position. |
Killer Angels |
The fight for Little Round Top |
Crisis Averted |
The Confederate thrust from Devil's Den is opposed by a solid line. |
| Click on the Thumbnail for a full-size photo | Description |
|---|---|
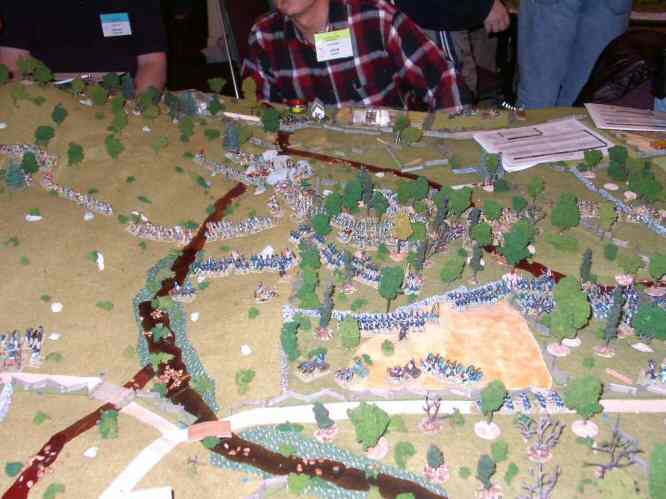
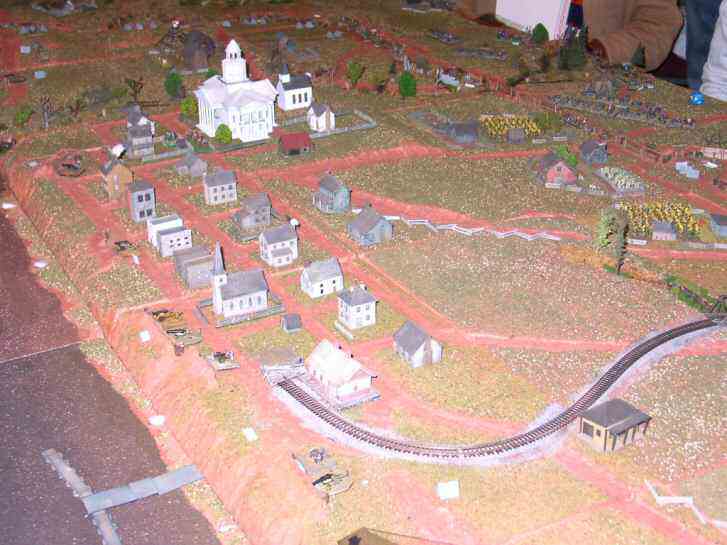 A view of the city |
The terrain was very well done |
 Another angle |
From a different perspective |
Gunboats |
Gunboats shell the town. Thanks to H. Lubbers for this photo. |
| Click on the Thumbnail for a full-size photo | Description |
|---|---|
20th Maine |
The 20th Maine awaits the Confederate Assault on the top of Little Round Top. |
Devil's Den |
The Confederates assault Devil's Den. |
Devil's Den 2 |
A view of the fight from Little Round Top. |
Devil's Den 3 |
The Union has been pushed out. |
Desperate Struggle |
The fighting rages. |
Copyright 2000-2019 Fire and Fury Games, all rights reserved
Web page maintained by
Webmaster@FireAndFury.com.