
Starting position

MkIVs advance

First Contact

Another angle

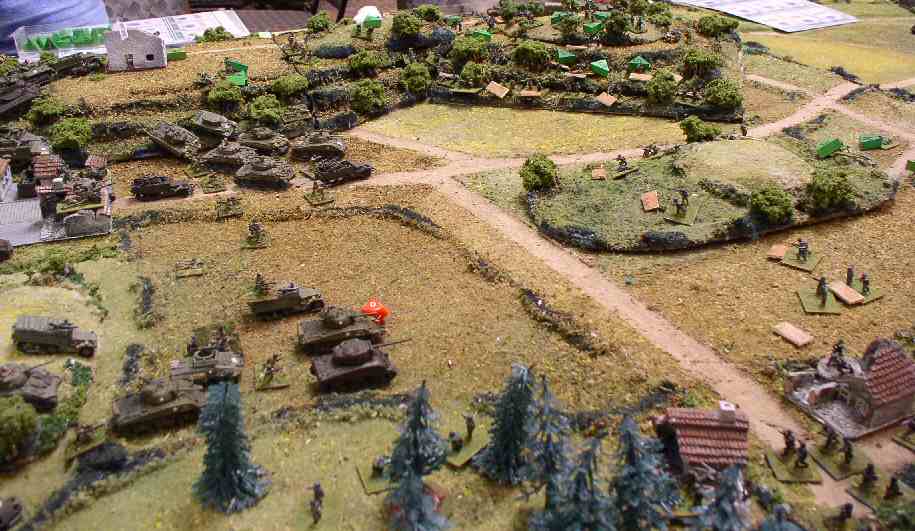
Defending the town

Overview

Left flank Defenders

Attacking the town

The Assault

Advance into the smoke

Point blank

Stugs slug it out

Carnage

More Carnage
| Click on the Thumbnail for a full-size photo | Description |
|---|---|
Starting position |
US hidden deployment at Parker's Crossroads. |
MkIVs advance |
German MkIVs approach the crossroads. |
First Contact |
Stugs and PzGrenadiers are greeted by the Americans. |
Another angle |
Another view of the first contact. |
Defending the town |
This angle shows the advancing PzIV and support troops from the town. The Stugs and PzGren are just off the photo to the right. |
Overview |
Just after the Germans move in, this gives an overview of the entire battle. |
Left flank Defenders |
U.S. Armor defending the left flank of the town. |
Attacking the town |
A view from behind the German Attackers. |
The Assault |
Moving into the preplotted smoke, the German attackers penetrate the outer edge of the defence. |
Advance into the smoke |
The Germans attack. |
Point blank |
Face-to-face combat in the town. |
Stugs slug it out |
Stugs at 60% but now advancing after taking out the Hellcat. |
Carnage |
Lots of burning wrecks prove it was a nasty fight. |
More Carnage |
Burning wrecks, smoke and a flurry of activity at the end. |
| Click on the Thumbnail for a full-size photo | Description |
|---|---|
 U.S. Forces move up |
US forces approach the old Muslim section of town. The US main objective is the French Army barracks seen to the rear, a brick building. |
 French Deploy |
The French decide to deploy forward in the Old Town. |
 U.S. artillery in action |
US uses smoke to cover their advance into town. Naval gunfire takes out half of the French armor (FT-17) with a lucky shot! ( 1 in 20) |
 French Fight hard |
The French put up stiff resistance. |
 U.S. pushes on |
U.S. forces slowly make headway into town. Pennies from heaven show dissipating smoke. |
 Beau Geste |
Raw French squads make an heroic stand at the Mosque holding off the Americans for nearly an hour. |
 Pushing Onward |
US finally clear the Mosque and try to take the rest of the town on the way to the barracks. |
| Click on the Thumbnail for a full-size photo | Description |
|---|---|
 U.S. deployment |
The U.S. deploys on a line around the town of Mausbach and the Weissenberg hill on the left. |
 German Forces |
German Front line infantry is backed up by several companies of Motorized Panzergrenadiers and a company of Panthers. |
 German Infantry in the Forest |
The German infantry had managed to infiltrate in the Hürtgen Forest on the left flank. |
 Parking lot on the Hill |
The U.S. player commits his armor and halftracks to back up the hill defenders. The result is more congested than I had hoped and stops the Germans cold. |
 Attack Repulsed |
The U.S. launches an attack, but, despite killing a few Germans, it runs out of steam. The U.S. temporarily is forced to retreat to the vehicle line. |
 Armored Faceoff |
A Panther moves up to support the Germans. Unable to kill it, the U.S. drops smoke on it to reduce its firepower. In the center, German Stugs engage in a long range duel with U.S. defenders. Although they had an advantage, they could not score kills at long range. |
 The Line Holds |
Germans moving up through the forest are held by the U.S. defenders. The U.S. forces on the hill also hold fast. |
 German Second Line |
German AT guns set up to defend the German rear. |
 Breakthrough |
The second U.S. artillery battalion has arrived, giving the U.S. the power they need to break through in the middle. |
 Here they come |
The U.S. forces move out from the town to chase the retreating defenders. |
| Click on the Thumbnail for a full-size photo | Description |
|---|---|
 Monterrey 1 |
 Monterrey 2 |
 Monterrey 3 |
| Click on the Thumbnail for a full-size photo | Description |
|---|---|
 Prarie Grove 1 |
 Prarie Grove 2 |
 Prarie Grove 3 |
 Prarie Grove 4 |
 Prarie Grove 5 |
 Prarie Grove 6 |
 Prarie Grove 7 |
 Prarie Grove 8 |
 Prarie Grove 9 |
Copyright 2000-2019 Fire and Fury Games, all rights reserved
Web page maintained by
Webmaster@FireAndFury.com.