
A panoramic view of the beach

DD tanks come to grief on the beach

One of the beach exits.

Life is a beach.

Infantry move up.

Moving up the left flank.

Breakthrough.
| Click on the Thumbnail for a full-size photo | Description |
|---|---|
A panoramic view of the beach |
Jerry set it up so that each American player would be able to assault a beach exit. This gave many people a chance to participate. This is a view of the battle from the West end. The bunkers in the foreground represent Point du Hoc. |
DD tanks come to grief on the beach |
The 88mm on the right of the picture takes out two assaulting tanks. |
One of the beach exits. |
The defences of one of the beach exits as seen from the sea. |
Life is a beach. |
More of the defences |
Infantry move up. |
American Infantry start to move up one of the exits. |
Moving up the left flank. |
On the East end of the beach, American Infantry move up the cliffs. |
Breakthrough. |
In the second game, a DD tank survives and breaks into the German defence. |
| Click on the Thumbnail for a full-size photo | Description |
|---|---|
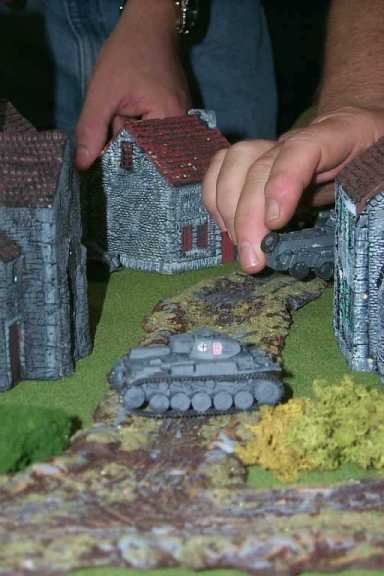
 Pz38t |
A Panzer 38t (or is it a 35t) moves up through a village. Eric Feifer runs lots of interesting early war scenarios. The early-war armor is nowhere near as imposing as the late-war, and often results in games featuring lots of maneuvering. |
 PzII and Armored car |
A Panzer II and an armored car move up through the same village. |
| Click on the Thumbnail for a full-size photo | Description |
|---|---|
 Corsair on the prowl |
Rich Hasenauer helped John set up his terrain in the second game. The result was eye-catching. Here a Corsair flies over the battlefield |
 U.S. Defences |
A view of the U.S. forces lying in wait. |
 Closeup of U.S. Defences |
A closein view of the U.S. position |
 Japanese Infantry moves out |
The Japanese infantry start to move up toward the U.S. positions |
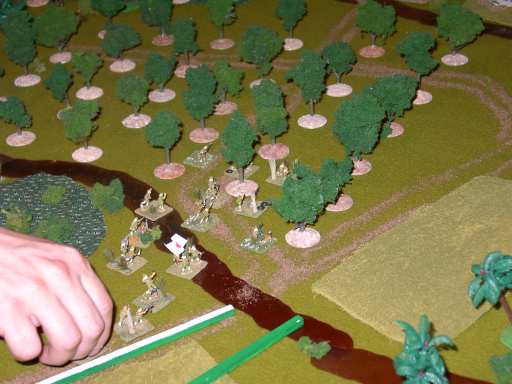 Moving through the Jungle |
The Japanese infantry infiltrate through the Jungle |
 Japanese Armor |
The Japanese armor follows their infantry. |
| Click on the Thumbnail for a full-size photo | Description |
|---|---|
 Photo 1 |
Bocage Photo 1 |
 Photo 2 |
Bocage Photo 2 |
 Photo 3 |
Bocage Photo 3 |
| Click on the Thumbnail for a full-size photo | Description |
|---|---|
 The British Move up |
One of the interesting features of this battle was the sparse terrain that allowed the British infantry to advance without being seen. As they get close, the British player lays down smoke |
 The British Move up |
One of the interesting features of this battle was the sparse terrain that allowed the British infantry to advance without being seen. As they get close, the British player lays down smoke |
 Airstrike! |
A typhoon joins the struggle. |
 The team |
This photo is of primary interest in that it shows Rich Hasenauer, Dave Choat, and Mike Pierce (in the hat), three of the Fire and Fury design and playtest team. |
 Contact |
Covered by smoke, the British infantry contact the German positions. This wave was thrown back. |
 Tanks join the fray. |
A squadron of Churchill tanks join the struggle. |
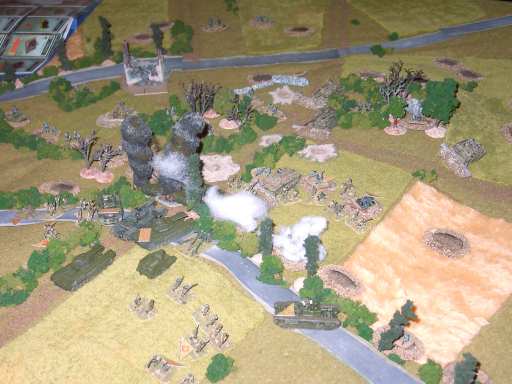
 Melee in the Middle |
Tanks, Infantry, and guns mix it up at the top of the hill. |
| Click on the Thumbnail for a full-size photo | Description |
|---|---|
 Tanks break through |
The German Tanks broke through the Russian lines but the halftracks and PzGr stay behind to clear the Russians out of the village. However, this is easier said than done. |
 Another Angle |
Another angle on the previous situation. The Russian infantry set up behind the edge of the woods, forcing the Germans to come in after them. They were backed up by a RU-12 regimental gun, useless in long range combat but... |
 Germans prepare. |
Backed up by a Grille, the German PzGr prepare to root the Russians out of the woods. The effective Russian tactic was to shoot at the Germans as they came in and then close combat the vehicles. The German tanks couldn't come back to help without exposing themselves to flanking AT fire. By staying back inside the cover, the Russian infantry didn't expose themselves to the deadly fire of the Grille and supporting arms. |
 Halftrack Motel |
German halftracks check in, but they don't check out (for our overseas customers, this is an allusion to an American television commercial for a pest control product called "Roach Motel"). As the Germans bogged down in the closed terrain the Russians continued to pick off the lighter vehicles. |
| Click on the Thumbnail for a full-size photo | Description |
|---|---|
 Mark Hayes. |
Mark Hayes smiles for the camera. |
 Dave Choat and Greg Lyle |
Dave and Greg man our booth. |
Copyright 2000-2019 Fire and Fury Games, all rights reserved
Web page maintained by
Webmaster@FireAndFury.com.