In 2010, R. Mark Davies toured the location of the Nor Mons/Pavée battle (part of Operation Bluecoat) featured in this scenario and took some interesting pictures that give a much better feeling for the terrain than can be obtained from maps alone. He also visited the War Memorial at the site and left a memento of a veteran of the battle who had recently passed away.
"The main thing to note is that the Perrier Ridge totally dominates the Burcy valley to the north of it and has a very good view of the Vire-Vassy highway to the south. The Presles Ridge to the north of Burcy also totally dominates the land to the north - an observer up there could see everything that moved on the Villers-Bocage to Vire highway south of the wooded ridge north of St Charles de Percy. It is a VERY interesting battlefield and to see the terrain does emphasise why the battle was so critical - in a way that maps and books do not fully convey.
Something else to mention is that a local told us that the slopes to the east of the battlefield and the crest of Point 224 (between Pavee and Catheolles) were covered in thousands of mines and were therefore inaccessible to both sides - this does perhaps explain why the battle took place on the shoulder of the hill and not the top?"
| Click on the Thumbnail for a full-size photo |
Description |
|---|

Memorial
|
The location of the battle memorial on a map of the battlefield. |

Photo Set Part 1
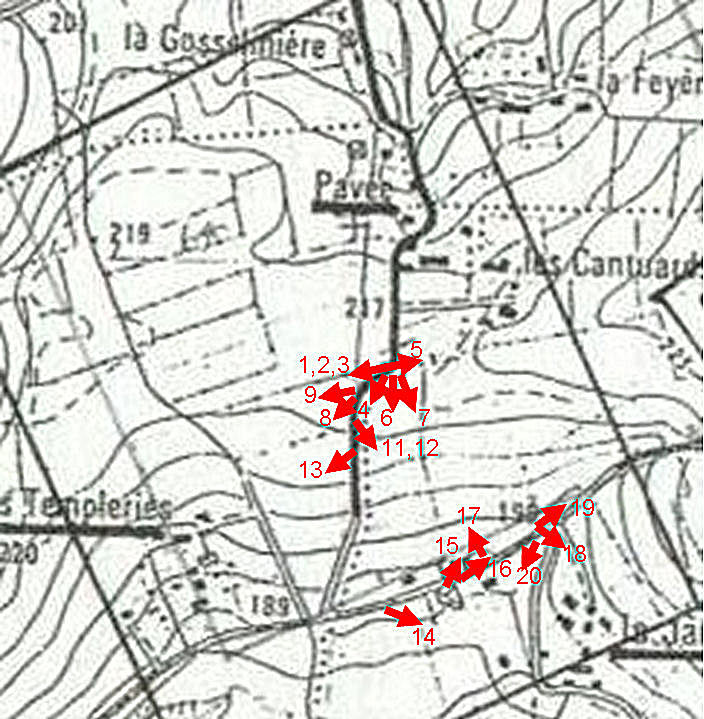
|
The location and angles of the first set of photos. |

1. Memorial
|
The Battle Memorial |

2. VC Citation
|
Closeup of Sidney Bates' Victoria Cross citation. |

50. VC Citation
|
Closeup of the memorial text. |

51. VC Citation
|
Another closeup of the memorial text. |

52. Evan Rees
|
In memory of Evan Rees, a veteran of the battle. |

53. Memorial
|
Another view of the memorial. |

54. Memorial
|
Another view of the memorial. |

55. Memorial
|
Another view of the memorial. |

3. Photo
|
The field behind the memorial where Bates won his VC (looking W from the memorial). |

4. Photo
|
SW from the memorial. |

5. Photo
|
Looking E from the memorial toward the hilltop of Point 224 which, according to a local man, was densely mined during the battle. The village of Chendolle is beyond the hilltop. |

6. Photo Looking S
|
To the south, the NorMons battlegroup had a commanding view of traffic on the main Falaise-Vassy-Vire highway and it is easy to see why the Germans couldn't tolerate the British possession of the Perrier Ridge. |

7. Photo Looking SE
|
Looking SE, across La Jarriere, to the highway beyond. Many of the German attacks formed up in the farms and orchards in the dead-ground of this photo and were subjected to the heaviest possible British-US barrage - a 'Yoke' Target. |

8. Photo Looking SW
|
Looking SW, across Les Templeries (another German forming-up point) toward Viessoix, the highway and the key defile where the highway passes under a very high railway embankment, just east of Vire. |

9. Photo
|
Down the road, SW of the memorial, looking W. |

10. Never Accept Gifts from Frenchmen
|
66 years later, a possibly live grenade is part of battlefield debris. Two French Policmen had this artifact, but were unaware of its identity or danger. |

11. Photo
|
Further down the road, looking SE toward La Jarriere. |

12. Photo
|
Photo of Local Terrain. |

11. Photo
|
Same spot, looking SW toward Les Templeries. |

14. Photo
|
At La Jarriere, looking SE, across orchards and farms that were completely destroyed during the battle. |

15. Photo
|
La Jarriere House - completely destroyed and restored to its original state (according to the owner, who was a boy in 1944 and who helped his father re-build it). |

16. Photo
|
Looking E from La Jarriere House, along the sunken road at the foot of the ridge. |

17. Photo
|
The Germans in this sunken road had pretty good cover and concealment from direct observation, but that didn't save them from the collossal barrage that was directed on this spot. |

18. Photo
|
The same spot looking SE. |

19. Photo
|
The same spot, looking E across the minefield to Point 224. |

20. Photo
|
The same spot, looking SW toward Viessoix. |

Photo Set Part 2
|
The location and angles of the second set of photos. |

21. Photo
|
Looking W, walking back to La Jarriere along the sunken lane. |

22. Photo
|
Walking back up the hill to the memorial, looking E toward Point 224. |

23. Photo
|
Photo of Local Terrain. |

24. Photo
|
Looking W along Bates VC's Field. |

25. Photo
|
Looking N from Sidney Bates' field, across the crest of Perrier Ridge toward Burcy (in the valley beyond). |

26. Photo
|
Looking E from Memorial Corner toward Point 224. |

27. Photo
|
As previous photo, but a few yards to the left, looking along the north side of the hedgeline on the crest. |

28. Photo
|
Looking NE from the same spot, toward Les Cantuards Farm. |

29. Photo
|
Pavée, looking E, a short way to the north of Memorial Corner. This is a new house, but Pavee Farmhouse was on the same foundations in 1944. |

30. Photo
|
The same spot, looking N. The large stone house on the bend has been apparently restored to its approximate orginal state (plus a new garage). This is probably the NorMons HQ, which was described as 'a large stone house behind the crest'. According to the survivng sketch map (see the scenario), the Regimental Air Post was certainly in the orchard immedately behind this house, so is seems very likely that the RHQ was situated here.
|

31. Photo
|
Looking W from the Stone House. This is where the supporting F&FY armoured squadron HQ took up hull-down positions behind the crest - again it would make sense for the armour Sqn Cdr to co-locate himself with the infantry Bn Cdr. |

32. Photo
|
Closeup of the Stone House (Normons HQ?). |

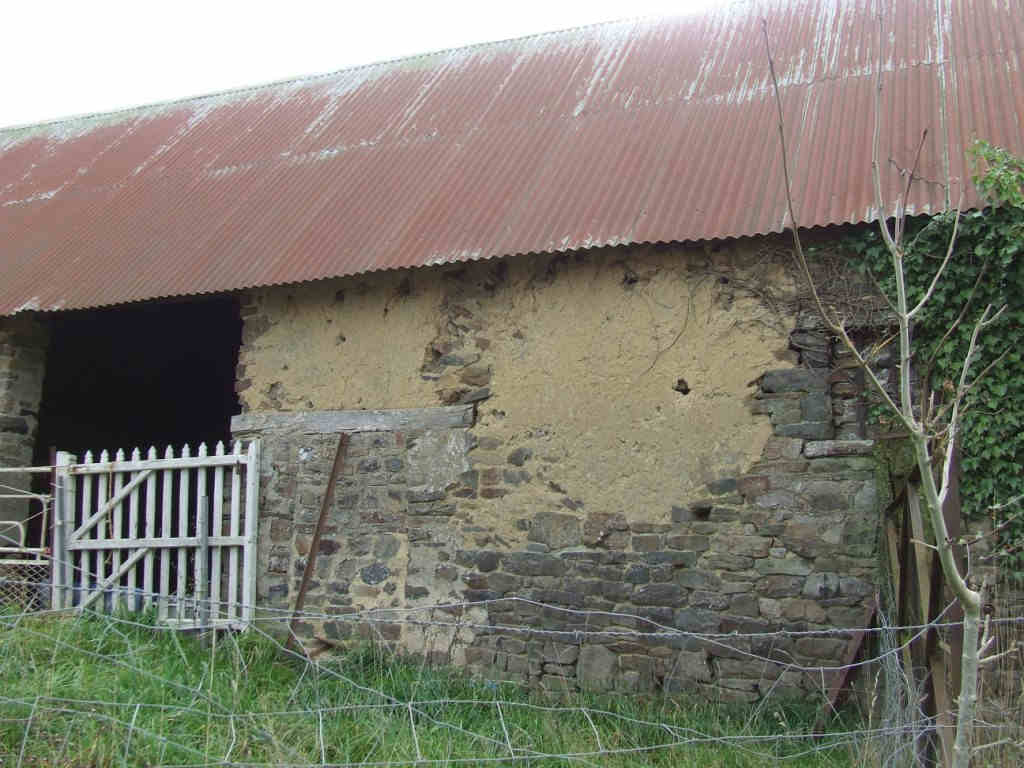
33. Photo
|
Pavée Farm barn, opposite the Stone House. Clear evidence of battle damage (note circular hole) and cheap repair with clay and gravel daub. |

34. Photo
|
The orchard immediately E of Pavee, looking E towards Les Cantuards and Point 224. Note the damaged barns (cheaply repaired with corrugated iron after the war). Although it isn't obvious in the photo, the ground is still pitted with shallow craters. |

35. Photo
|
A similar view to photo 34. |

36. Photo
|
Looking N from Pavée, down the slope to Burcy. |

37. Photo
|
The view a little further N along the Burcy Road. The Regimental Aid Post was in the orchard on the left, behind the Stone House. |

38. Photo
|
Having walked N along the Burcy Road to the fork, this photo is looking back (S) at the orchard, RAP and Stone House. 160 men of the NorMons were killed in this battle and many more were injured - the majority would have been carried back to this orchard by their comrades. |

Photo Set Part 3
|
The location and angles of the third set of photos. |

39. Photo
|
The view S back up the hill to Pavée. |

40. Photo
|
A field E of the Stone House, where the reserve troop of the F&FY squadron found a good hull-down position on the rear slope of the ridge, covering the crest. Tanks here would undoubtedly have been able to deal effectively with German tanks cresting the ridge, some 200 yards in front. |

41. Photo
|
41-49:Views from the hedgeline on the crest of the ridge, running E from the Memorial Corner to Point 224. |

42. Photo
|
See 41. |

43. Photo
|
See 41. |

44. Photo
|
See 41. |

45. Photo
|
See 41. |

46. Photo
|
See 41. |

47. Photo
|
See 41. |

48. Photo
|
See 41. |

49. Photo
|
See 41. |